

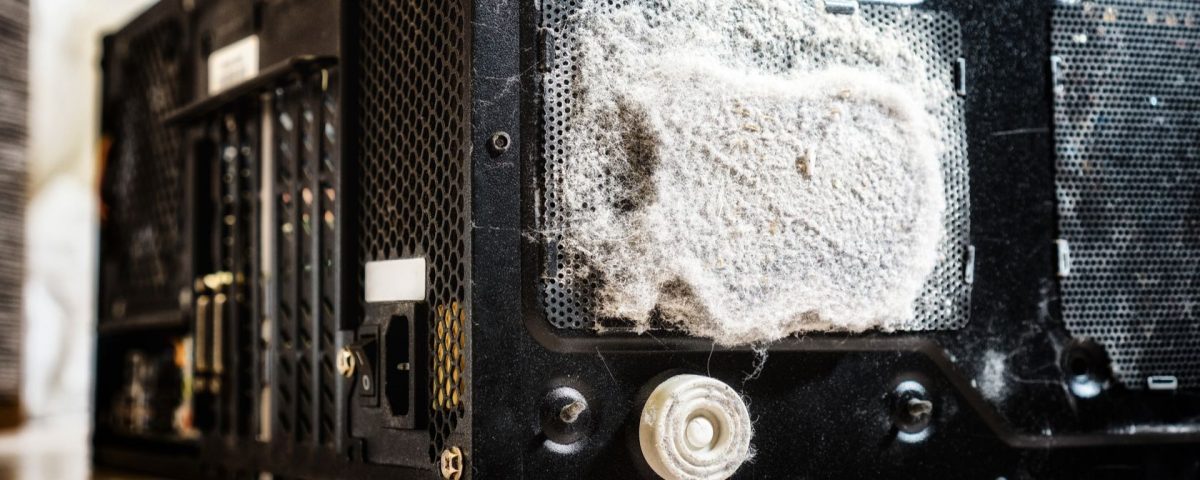
It’s important to keep your computer clean so it runs at its best. The dust that builds up inside your computer over time can increase the heat inside, which in turn reduces the life of your hardware by making it work harder.
Thankfully, cleaning your desktop isn’t terribly difficult. Let’s walk through how to do it.
Step 0: Prepare Your Materials
While you don’t need much to clean your desktop, having a few extra accessories can make the job easier.
The essentials are as follows:
- A can of compressed air: This allows you to blow out the dust from the various nooks of your machine. You can buy this on Amazon or at stores like Walmart.
- Cleaning cloths: You’ll want a few soft cloths for cleaning up dust that’s stuck in the case. For best results, use lint-free cloths so they won’t leave additional debris. Avoid paper towels, which will leave fibers all over the place.
- A flashlight: Use this to light up the dark corners of your desktop so you can see where dust is hiding.
- An old toothbrush or cleaning brush: Dirt tends to get clumped up on fans inside your PC, which are one of the most important areas to clean. Having a brush makes it easier to remove this; try an old toothbrush if you don’t have any small brushes handy.
You may also want to have the following:
- A cotton swab or other small, thin object: When you blow compressed air into your PC’s fan, you can use this to stop it from spinning. They can also be useful for cleaning tight areas.
- An anti-static wristband: Touching your PC’s components while you have static electricity built up in your body could destroy them. You don’t necessarily need a wristband if you’re careful. But it’s better to err on the side of caution, especially if you’re working in a static-prone environment.
- A screwdriver: Depending on your case, you may need a screwdriver to open it. Some cases have thumb screws that you can open by hand instead.

Do not use a vacuum to clean your computer. This could cause a static buildup that ruins components inside your PC.
Step 1: Unplug Everything and Move to Your Workspace
To start, fully shut down your computer. When it’s powered down, unplug all the cables from the back and the front. If you have many cables connected, you may want to take a picture so it’s easier to put them back the same way.
If you prefer, you can instead leave only the power cable connected to your computer and shut off the switch on your power supply. As long as your machine is connected to a properly grounded outlet, your PC case will remain grounded during the process. If this isn’t an option, unplug the power cable and take precautions against static buildup as mentioned above.

Now, bring your desktop to a suitable space for cleaning. Ideally, you should be outside so you can blow out dust without worrying about where it goes, and have a supply of fresh air. If this isn’t possible, work somewhere where dust spreading won’t be an issue, like a garage. Any inside place should also have good airflow since you’ll be using compressed air.
Step 2: Open Your PC Case
Before you open your case, it’s not a bad idea to take a cloth and wipe off the top and outside of your PC case. That way, you don’t knock dust from the outside back inside after you go through the whole process.
Next, open your case. Usually, you’ll find screws on the back that let you loosen the side panels to remove them. These may be thumb screws or require a screwdriver. If you can’t figure out which screws hold the side panel in, consult the manual for your case.

Once removed, set the screws aside somewhere you won’t lose them. If your PC has removable panels on both sides, open both so you have more room to work.
Step 3: Clean Dust From the Inside Using Canned Air
Now you can get to the bulk of your cleaning. You’ll likely see dust built up in several areas of your computer, including the bottom, on the fans, and in the storage drive bays.
Use your compressed air to blow out as much dust as you can. If your can includes a straw, insert that into the nozzle for better accuracy.

Remember a few tips when using compressed air:
- Before you shoot canned air into your computer, spray a few blasts in a safe direction to make sure that there’s no liquid in the tip.
- Never spray canned air upside-down, as this will shoot the liquid out of the can.
- For best results, spray the air in blasts, as it will get cold quickly if you hold the trigger down.
- Use canned air in a well-ventilated area. Don’t get it on your skin, and don’t breathe it in if possible. Try to keep your face away from the PC case while spraying.
- When you spray the fans, use a cotton swab, your finger, or similar to stop the fan from spinning. Rapidly spinning a fan can generate electricity, which could damage your PC’s components.

Make sure you blow the dust out of your case and not further into it. Use your flashlight to illuminate areas that are hard to see, as there’s likely dust stuck there too.
After you take a pass with your canned air, look again for spots that you missed or where dust might have resettled. Use your cloth to wipe up spots with a lot of dusty surface area, like the side of your graphics card and floor of the case. Spray air into any slots or ports that have buildup on them.
You’ll likely see some dirt stuck onto the PC’s fans. To remove this, use your old toothbrush or other cleaning brush to scrape it off. If you don’t have either, try scraping it off with a cotton swab or similar.

Pay close attention to your CPU fan and heatsink. The processor is one of the components that gets the hottest, so keeping it free of dust is vital. You can dab your cotton swab in isopropyl alcohol for particularly nasty gunk; make sure it’s only damp and not dripping wet.
Of course, how dirty your PC is will depend on your environment, how long it’s been since you last cleaned it, and other factors. If you smoke or have pets that shed, your PC will be dirtier.
If you’re comfortable doing so, you can remove components like the video card and RAM to make your PC easier to clean. This also allows you to blow dust out from the ports those components were plugged into, and clean the fans of your video card more easily. Doing so isn’t necessary, but gives the opportunity for a deeper clean if needed.
One area that’s easy to forget is the dust cover protecting the power supply fan, if your case has this. Make sure to remove that and get rid of any dust it’s caught over time, then check the fan behind it too.

Step 5: Put Your PC Back Together
Take a final once-over with your flashlight to make sure everything looks clean. While you’re here, it’s not a bad idea to inspect the inside of your PC for signs of damage. Check for frayed cables, loose connections, or anything else that looks out of place.
When you’re satisfied, put the side covers back on your case. The exact method will depend on your case, but they usually slide right into a groove. Once the panels are on firmly, put the screws back in to finish the job.

Bring your computer back to its usual spot, then plug everything back in. Don’t forget to turn the power supply back on if you shut it off.
At this point, you may wish to clean other pieces of computer hardware too. See the following guides for more on these:
Clean Desktop, Happy Computer
Now you know how to clean the inside of your PC. Repeating this process every so often (such as once a year) will prevent excessive dust buildup in your system. To reduce the cruft that gets inside in the meantime, keep your desktop off the floor and limit its contact with pets, if possible.
Meanwhile, since you’ve taken the time to do physical maintenance, it’s a good chance to also clean the software on your system. Removing old apps and freeing up space will help your computer feel fresh.

Read Next
About The Author


