


Zoom users have often reported having trouble using the app or attending meetings via its web client, even with a fast internet connection. Typical issues include video quality deteriorating in the middle of video conferences, video playback lagging out of the ordinary, and sharing screen becoming unresponsive for no reason.
Usually, this happens when your system isn’t powerful enough to handle high real-time processing. Some users have even reported errors related to high CPU usage messing up their meeting quality.
If you are experiencing the same issue, we will cover a few fixes to help you overcome it on Windows.
Are You Experiencing This Issue With the Zoom Web Client?
If you consistently experience high CPU usage when using Zoom’s web client or receive a related error, this might be a browser-level issue, and the upcoming fixes discussed in the article might not help much.
To solve the browser-level issues, check out our guide on making Chrome use less disk space. If you are using another browser, balance out its CPU usage by making appropriate changes.
To lower the CPU consumption on the Zoom desktop application, perform the below fixes.
1. Ensure Zoom Is the Culprit
Ensure that no graphics-intensive applications or tasks are running simultaneously with Zoom taking up the CPU. Windows Task Manager is the best place to find out.
Thus, right-click on the Start button in the lower-left corner and navigate to Task Manager. Pay attention to tasks that contribute the most to CPU usage in terms of percentage. Consider closing all other processes running in parallel if you find that no task is significantly using too much CPU, but many apps are eating up a small portion.
Watch out for background processes running without your consent, and shut them off. To end a task, right-click the process and select End task. See if that helps reduce CPU usage.

If closing every other process does not help reduce CPU usage or Zoom leads all other processes in percentage, then the problem lies with the app and requires further investigation.
2. Tweak Zoom’s Settings
Changing Zoom settings should be the next step to lower CPU consumption if the problem comes from the Zoom app. To access Zoom settings, click on your profile icon in the top-right corner and go to Settings.

Go to the Video Settings and check the following:
- Make sure the Camera quality is set to the Original ratio instead of HD.
-
Uncheck all options in My Video.
-
The rest of the settings should be set as follows:


In addition, click on the Advanced option located at the bottom of the Video settings page. Make sure all three boxes in Use hardware acceleration for are checked as they all contribute to reducing CPU usage.

In the Advanced settings of Share Screen, ensure that all three boxes for Use hardware acceleration for are checked. Additionally, try different values of FPS to see if limiting your screen sharing frame rate has any effect.

Afterward, go to Zoom Apps settings and hit the Clear button to clear the local app data and cookies.

If you are using any virtual backgrounds, video filters, or avatars, select None from the Background & Effects settings.
Last but not least, make sure the Font Size is set to Small in Accessibility settings.

All of these tweaks will indeed reduce CPU consumption. If not, the problem lies elsewhere. If so, keep implementing the below fixes.
3. Update Zoom App
The use of an outdated Zoom version can also result in consuming more resources than necessary, resulting in high CPU usage. Consequently, before making any changes to the operating system, update the app to ensure no hidden bugs or issues remain with the installation.
Follow these steps to update the Zoom app:
- In the top-right corner, click on the profile icon.
-
In the dropdown menu, click Check for updates.

Zoom will check for available updates automatically, updating the app to its latest version. If it has already been updated, it is time to make some OS-side changes.
4. Update Your Graphics Driver
If you’re experiencing high CPU usage only while communicating in a video call, your graphics card might not be processing the graphics correctly. Driver interference can also cause high CPU consumption. Therefore, updating the graphics driver becomes imperative.
We have a guide on updating the graphics driver the right way if you’ve never done it before.
5. Run an SFC Scan
A system file checker is a great tool that Windows offers to look for and repair corrupt files lingering in your computer. By running an SFC scan, you can ensure that there is no corrupt Zoom file that’s unusually halting Zoom’s processing, leading to it asking for more CPU power to deal with it.
Follow the steps below to run an SFC scan:
- Type “cmd” in the Windows search box.
- Right-click on the Command Prompt app and click on Run as administrator.
-
Type “Sfc /scannow” and hit Enter key.
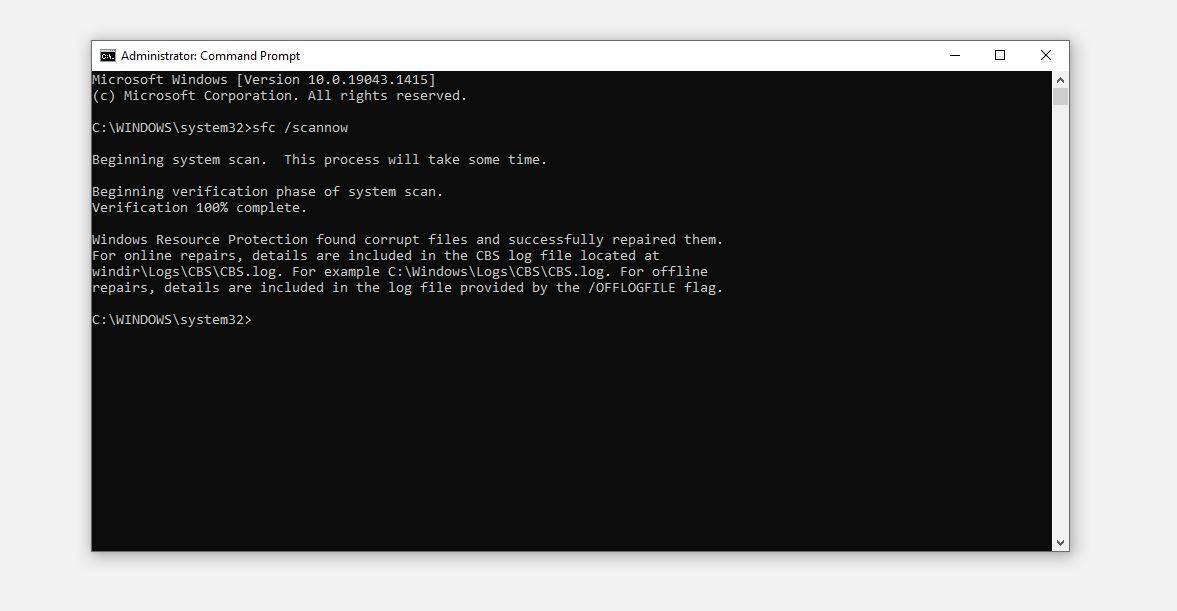
The command prompt should be run as an administrator to ensure exclusive access to all files. Otherwise, the scan will not run.
If the SFC scan yields a clean result, the problem is somewhere else. If it reports an error, make sure to fix it if it pertains to the Zoom app.
Furthermore, run a malware scan to prevent malware from interfering with the app’s functionality. To do so, use the Windows Defender scan to get rid of the malware on your computer.
6. Reinstall the Zoom App
In cases where none of the fixes work, it’s best to install the app again from scratch. Performing this action will eliminate the possibility of corrupt app files causing the issue that the SFC scan might have missed.
Uninstall the previous installation before you do that. Go to the Windows Control Panel and navigate to Programs > Programs and Features. Find the Zoom app, right-click on it, and select Uninstall.

Afterward, grab a fresh copy of the app from Zoom’s official website and install it. Hopefully, this will fix the high CPU consumption issue.
Consider running the app in compatibility mode as a last resort if uninstalling the app fails.
7. Run the Zoom App in Compatibility Mode
If both your Zoom app and OS are up to date, you can skip this step. If you’re using an outdated version, it may not be compatible with your OS. You may be able to resolve the issue by running it in an old OS environment.
Follow these steps to run an app in compatibility mode:
- Find the Zoom installation folder.
- Right-click on the Zoom icon and go to its Properties.
- Go to the Compatibility tab.
- Check the box for “Run this program in compatibility mode for.”
- Choose your preferred OS from the dropdown.
-
Click Apply and hit OK.

If you are still experiencing high CPU usage while using the Zoom app, you may consider switching to a web client until the app is fixed.
Zoom App Still Consuming Too Much CPU?
The fixes in the list should reduce Zoom’s resource consumption. If those are unsuccessful in reducing CPU usage, see if the issue persists with other applications. Maybe it’s time to upgrade your hardware if that’s a yes. Even if you cannot afford to do that, at least get more RAM to alleviate some burden on the CPU.

Read Next
About The Author


